Project cancellations are one of the most frustrating challenges for freelancers, consultants, and small business owners. After investing hours in planning, researching, or preparing deliverables, a cancelled project can disrupt schedules and reduce revenue. Fortunately, including a “kill fee” in your contracts provides a fair and professional way to get compensated when a client cancels a project. Understanding how to calculate, invoice, and communicate a kill fee ensures that both your time and resources are valued without damaging client relationships.
Recognizing When a Kill Fee Is Appropriate
A kill fee is applicable when a client cancels a project after you have committed time, effort, or resources. This is particularly relevant for work that involves upfront preparation, such as:
Creative projects like design, photography, video production, or marketing campaigns
Consulting engagements and strategy sessions
Software development or technical projects requiring resource allocation
Without a kill fee, businesses may be left uncompensated for work already underway or for lost opportunities caused by reserving time for the client.
The Importance of Contractual Clarity
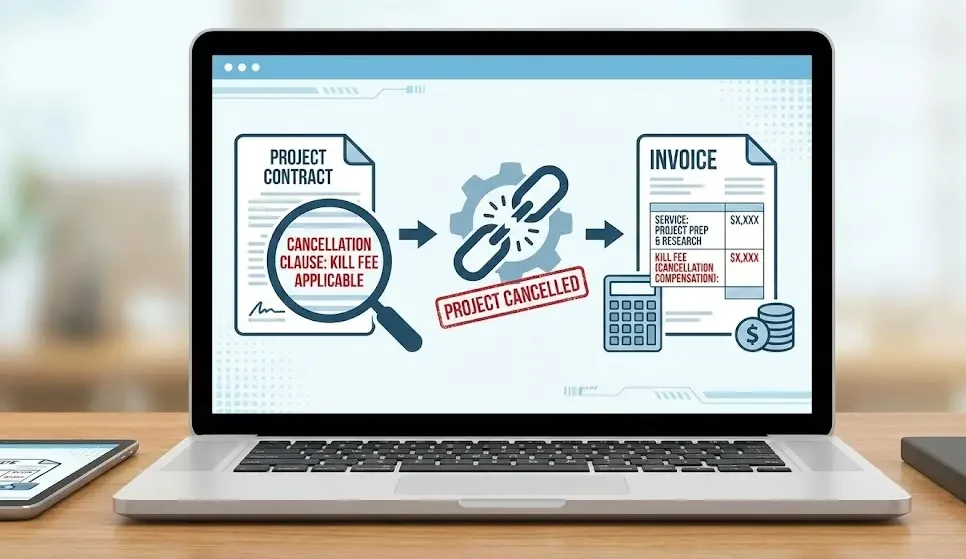
The most effective way to handle cancelled projects is to include a kill fee clause in your contract. Doing this before work begins sets clear expectations and reduces misunderstandings. A well-written clause should cover:
The percentage of the total project fee applicable as a kill fee (commonly 25–50%)
Project milestones that trigger the kill fee
How and when the kill fee will be invoiced and paid
Contracts that outline kill fees create legal clarity and make it easier to issue an invoice without conflict.
Calculating the Kill Fee
Calculating a fair kill fee requires assessing what work has already been completed and what resources have been committed. Consider:
Hours spent on project preparation, research, or initial deliverables
Costs incurred, such as materials, software, or subcontractor fees
Opportunity cost of reserving time that could have been used for other projects
For example, if a design project was cancelled after a week of work, and you agreed to a 30% kill fee, the fee would cover the time invested and partially compensate for lost opportunities. Providing a clear breakdown helps the client understand the charge and reduces disputes.
Preparing a Kill Fee Invoice
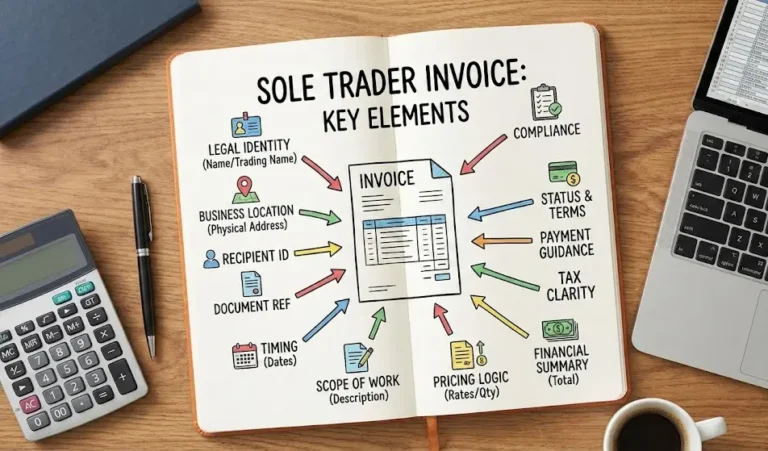
Issuing a kill fee invoice is similar to a standard invoice but requires extra clarity. Every kill fee invoice should include:
Project and Client Details
Project title or reference
Client’s name and contact information
Reason for the Fee
A brief explanation indicating that this is a kill fee due to project cancellation
Optional: details of the work or resources already committed
Amount Due
The total kill fee amount
A clear breakdown if multiple components contribute to the fee
Payment Instructions
Accepted payment methods
Payment terms (e.g., due within 14 days)
A transparent invoice not only encourages prompt payment but also demonstrates professionalism.
Communicating the Kill Fee Professionally
Even with a contract, the way you present a kill fee matters. Clear, professional communication helps preserve client relationships. Consider these tips:
Send a polite, concise email explaining the invoice
Include a brief description of the work completed or time invested
Avoid emotional language; stick to facts and figures
Reassure the client that the fee is standard practice to compensate for time and resources
Professionalism reassures clients that your approach is fair and reasonable.
Handling Client Pushback
Sometimes, clients may hesitate to pay a kill fee. To manage this situation:
Refer to the kill fee clause in your contract
Provide an itemized breakdown showing the time and resources spent
Offer to discuss partial adjustments if appropriate, without undermining your rights
Approaching disputes calmly and factually often resolves them faster than arguing or becoming defensive.
Best Practices to Avoid Kill Fee Confusion
Preventing misunderstandings before they happen is always better than correcting them later. To minimize confusion:
Include clear kill fee terms in every contract
Confirm milestones and cancellation conditions with the client upfront
Keep detailed records of work completed, hours spent, and resources committed
Send early updates on progress so clients are aware of ongoing efforts
By documenting everything, you reduce the likelihood of disputes and ensure your invoicing is justified.
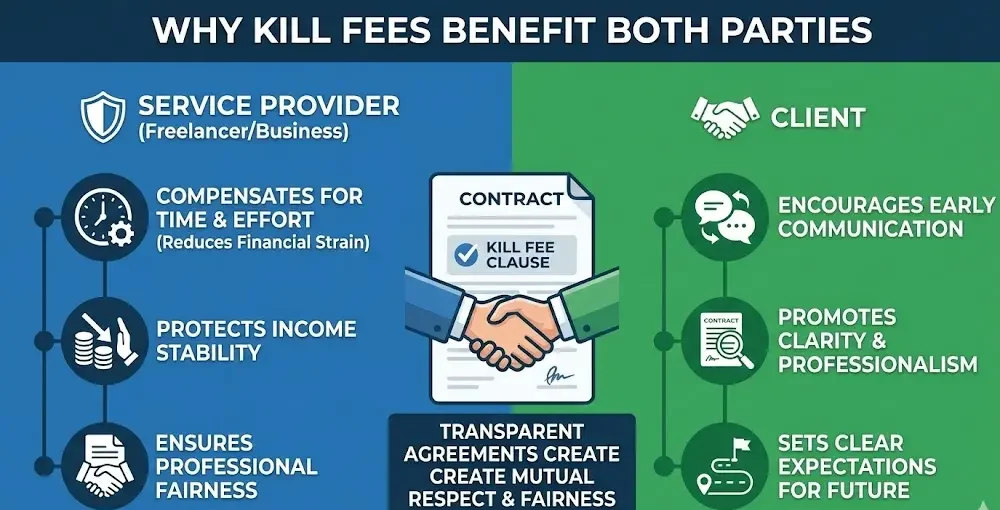
Why Kill Fees Benefit Both Parties
Kill fees aren’t just about protecting the freelancer or business; they also benefit the client:
Encourages early and clear communication about cancellations
Compensates the service provider for time, reducing financial strain
Promotes professionalism and clarity in business dealings
When handled transparently, a kill fee creates fairness and sets expectations for future projects.
Recordkeeping and Tax Considerations
Like regular invoices, kill fee invoices must be recorded for bookkeeping and tax purposes. Ensure you:
Keep a copy of the invoice in your records
Note the original project and cancellation details
Include it in income reports if required by tax authorities
Accurate recordkeeping ensures that your financial statements reflect actual revenue and supports compliance during audits.
Conclusion
Project cancellations are inevitable, but they don’t have to result in lost income. A kill fee provides a fair solution for both the service provider and the client. By including a kill fee in contracts, calculating it transparently, issuing detailed invoices, and communicating professionally, freelancers and small business owners can protect their income without damaging client relationships. A kill fee is not just a financial safeguard—it is a professional way to handle the unexpected.